iPad Setup Instructions
Patient Check In is designed to be easy and fast. Setup is just as easy with no technical experience needed.

Run the Patient Check In App
- In Settings, Go to iTunes and make sure you are logged out
- Double tap the home button and swipe all apps closed
- Start the App
Setup the Patient Check In App
- On the iPad, Open the Patient Check In App
- Chose English at the first screen
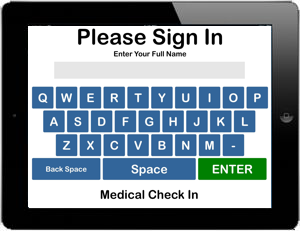
- Type CONFIG at the first name screen and click ENTER
- Insert your System ID and Password
Setting Choice Buttons
The easiest way to set the choice buttons is from your online configuration.Log in to the back end and go to Configuration. Set your choice buttons and Save. After you have set your choice buttons in the server side, the iPad can download the configuration making it easy to sync with the server.
To sync with the Server
On the iPad, at the first name screen, type UPDATE and touch Enter. Wait about 5 seconds. This will retrieve the configuration from the server. Try a test entry to confirm your choices are in effect.Securing the iPad
Open the Settings App on the iPad and make these general settings changes.
- iTunes -> make sure you are logged out
- Bluetooth -> Off
- Screen Time->Turn Off Screen Time
- Siri & Search->Listen for "Hey Siri"->Off
- Siri & Search->Press Home for Siri->Off
- General->Software Update->Automatic Updates->Download iPadOS Update->Off
- General->Software Update->Automatic Updates->Security Responses & System Files->Off
- Display & Brightness->Appearance->Light
- Display & Brightness->Auto-Lock->Never
- Apple ID->Sign Out
If your stand does not cover the home button, you may want to run Guided Access on the iPad to further secure the app. This will remove the swipe down abilities to open the notifications area and it will lock the home button to a passcode.
That's it! Patient Check In is so easy, you should be running in about 15 minutes. If you have any trouble, please call us and we are more than happy to help. Your subscription includes unlimited support.
Enable Guided Access
Guided Access allows you to secure the home button and restrict access to any other program including the notifications area.- Launch the Settings app on your iPad.
- Tap on Accessibility.
- Tap on Guided Access under the General section.
- Toggle Guided Access On.
- Tap on Display Auto-Lock and tap never
- Tap on Passcode Settings and tap set guided access code (choose one you will remember)
- Open the Patient Check In App
- Triple Tap the Home Button
Be sure not to lose your passcode. Only Apple can recover this